

Creating Groups and Groupings - Video
Groups
Download PDF guide for - Creating Groups and Groupings
Groups can be used to control how groups of students interact with activities, and what students can see from other groups. Moodle has three group options that are available at course wide level and on a number of activites:
No groups
There are no groups. In collaborative spaces such as Forums or Wikis, everyone can see what others are posting.
Visible Groups
Group members work in their own group, and can also see other groups.
Separate Groups
Group members can only see posts within their own group, and cannot see other group
Use
- You are a teacher in a course where you have several classes and you want to filter your activities and gradebook so you only see one class at a time.
- You are a teacher sharing a course with other teachers and you want to filter your activities and gradebook so you don’t see the students from your colleagues’ classes.
- You want to allocate a particular activity, resource or topic section to just one class or set of users and you don’t want others to see it.
Automatically adding enrolled students to groups
- Click on Gear Icon > Users > Enrolments Methods > UofG Enrolment database from the Administration block. This will take you to the following page:
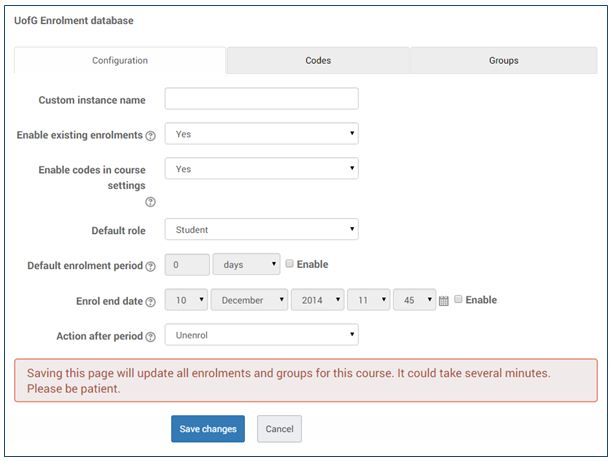
- Click on the Groups tab on the right hand side
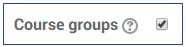
- If you have multiple cohorts of students enrolled on the course they can be separated into groups defined by course code by clicking the Course groups box.
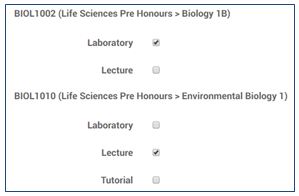 Moodle will also pick up groups students have been assigned to in MyCampus and allow you to set them up by ticking the appropriate boxes.
Enabling groups at course level
If the group mode is set (No groups, Separate groups or Visible groups) at course level this will be the default mode for all activities within the course. Each activity that supports groups can also define its own group mode, however, if the group mode is forced at course level, the group mode setting for each activity is ignored.
- To set group mode at course level click Course administration > Edit settings from the Administration block on the right hand side of your course page.
- On the course settings page click on Groups to expand the section.
Groupings
A grouping is a collection of groups. Using groupings allows you to direct tasks at multiple groups in your course.
Use
- You teach students in a course called 'The Art of Language'.
- Your students are divided into four groups, Listening, Reading, Speaking and Writing, and for much of the course they work in these groups.
- You wish the students to work on a project, exploring passive and active language. You create a grouping 'Passive Language' and assign the Listening and Reading groups to this grouping. You create a grouping 'Active Language' and assign the Speaking and Writing groups to this grouping.
- Using the Restrict access feature you set certain tasks only for the Passive Language grouping and other tasks only for the Active Language grouping.
- Now the groups can work together, within their grouping, on their respective focus areas without the other grouping observing their activities.
- At the end of the project you can bring the groups together in an activity for all participants to share their learning.
Setting up groupings
When using groupings you need first to put the users into a group and then put them into a grouping. A single grouping can house one group or several groups.
- Click on Gear icon > Users > Groups from Administration block on the right hand side of your course page.
- Click on the Groupings tab near the top of the page.
Click the Create grouping button.- In Grouping name enter the name of your grouping, this will be used to easily identify which grouping should have access to specific resources and activities.
- Click Save changes.
You will now see your grouping listed on the Groupings page. - To add groups to your grouping click the Show groups in grouping button on the right hand side.
- From the Add/remove groups page, click to highlight your required group in the right hand Potential members column.
- Click the add button to move them in to the grouping Existing members column on the left hand side.
- Click Back to groupings.
- You can now return to your course page
- Click Turn editing on at the top right hand side of your course page.
- Add the activity you would like to assign to a grouping or choose Edit settings from the edit drop-down menu next to an activity.
- On the Course settings page click on Common module settings to expand the section.
- In Group mode drop-down menu select Separate or Visible groups
Restricting activities to groups or groupings
In previous versions of Moodle activities were restricted to specific users using Groupings and the Available for groups members only setting.
Available for group members only was an experimental feature in earlier versions of Moodle and was removed in Moodle 2.8. The group restriction option in conditional activities now provides this functionality.
Set up
1. In the activity settings screen click ![]() to expand the Restrict access section
to expand the Restrict access section
2. Click Add restriction.
3. Choose Group or Grouping from the Add restriction pop-up box.
4. From the drop down menu choose the group the access restriction rule concerns.![]()
Note: If you would like this to apply to more than one group. Repeat the process for adding a restriction or use a grouping.
5.The eye icon can be used to alter how the activity is displayed on the course page
![]() Eye opened means the activity is displayed greyed out if the user does not meet this condition
Eye opened means the activity is displayed greyed out if the user does not meet this condition
Eye with a strikethrough activity is hidden entirely if the user does not meet this condition

This Moodle guide was created by The University of Glasgow Learning Technology Unit and is licensed under a Creative Commons Attribution-NonCommercial-ShareAlike 4.0 International License.