

Re-sizing images
Paint.net
You can download paint.net from the IT Services Software Centre, or if you have an SSD machine, an icon for this is on your desktop.
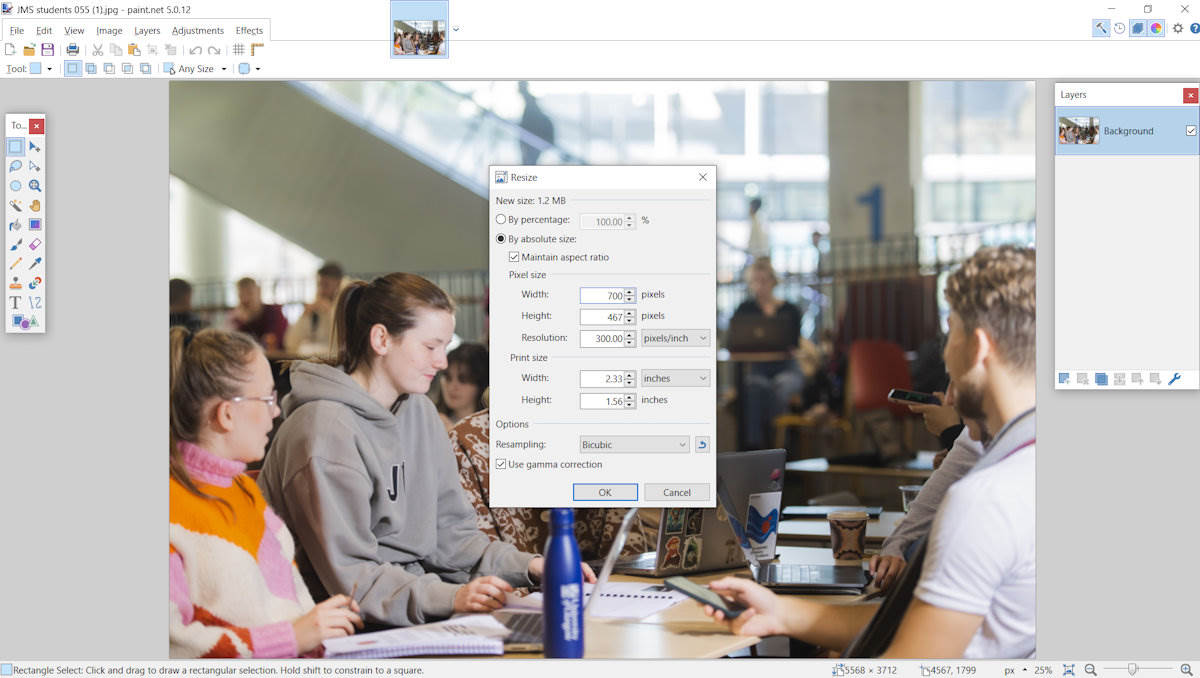
Open your original image in paint.net, press control + R to re-size, ensure maintain aspect ratio is checked, change the Width to 700, press enter (height will automatically adjust as maintain aspect ratio is checked, don't change it):
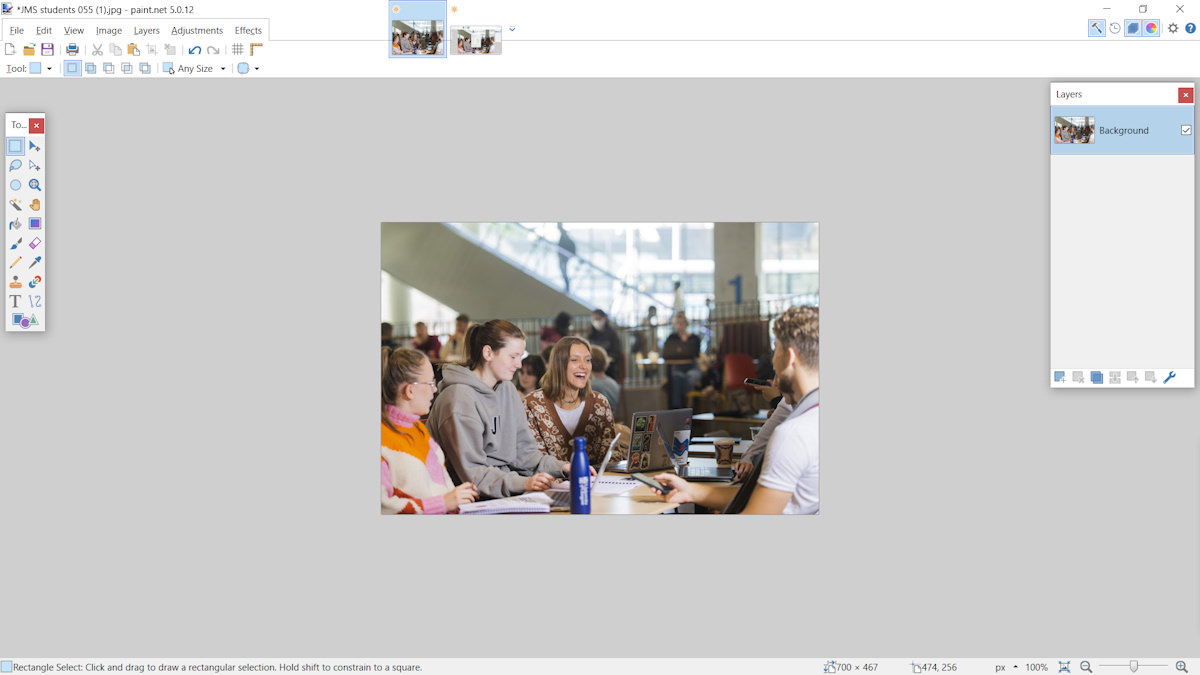
Re-sized image appears smaller on screen, now press control + N to create a new image:
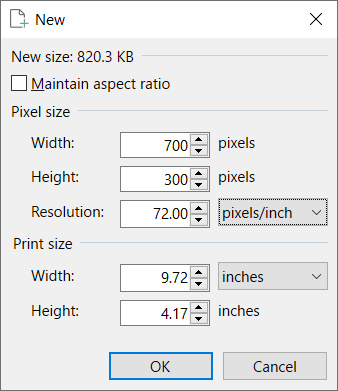
Maintain aspect ratio not checked, enter width 700, height 300, press enter/ok:
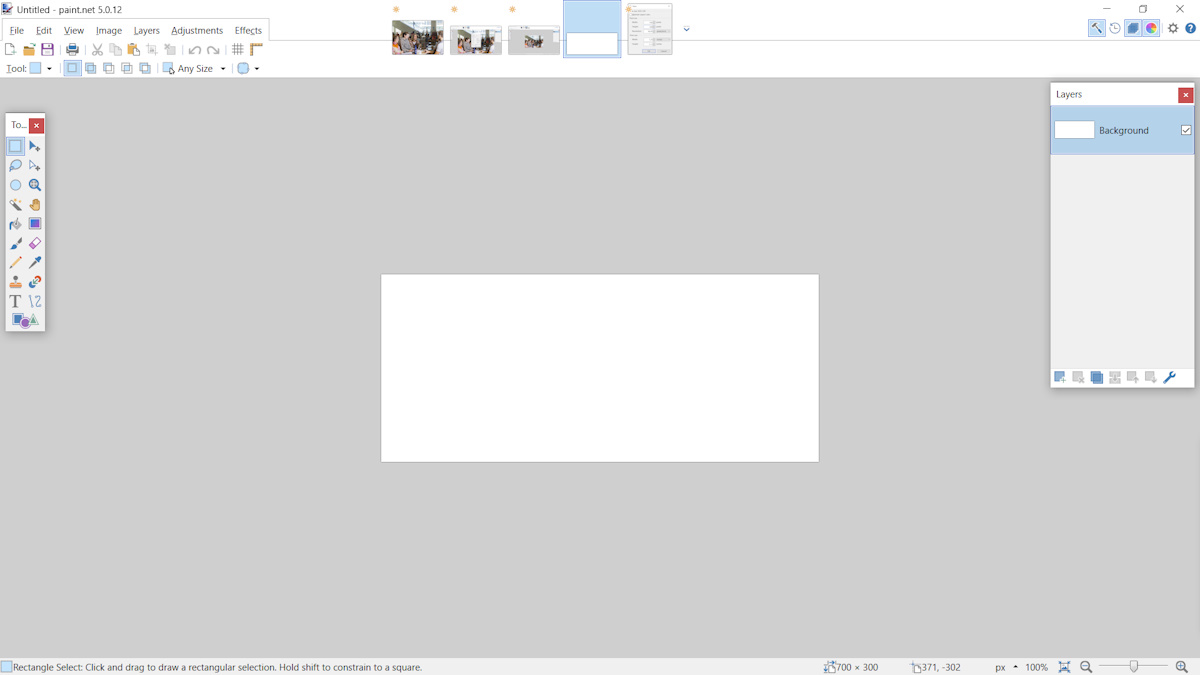
New blank tile image at 700x300 on paint.net canvas:
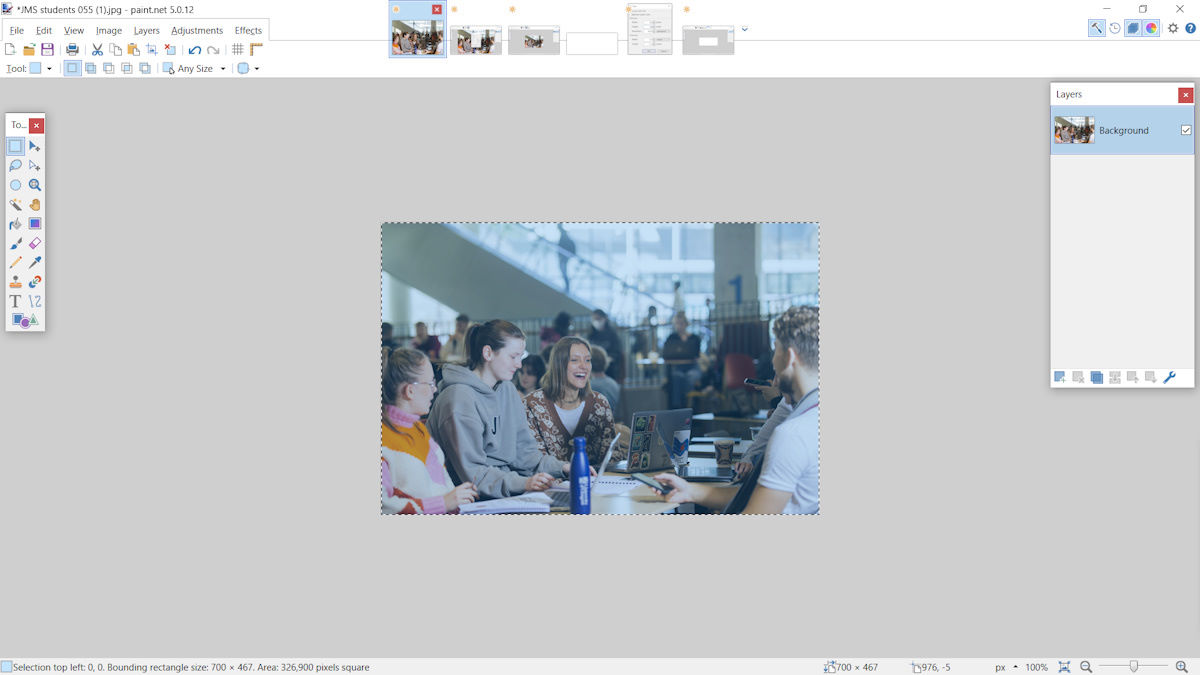
In the top row of images, select your original image you re-sized to 700 width, control + A to select all, then control + C to copy:
Select your blank 700x300 white tile you created from the image list at the top and press control + shift + V to paste the image as a new layer. The image we are pasting is the same width but taller, so paint.net alerts us as follows:
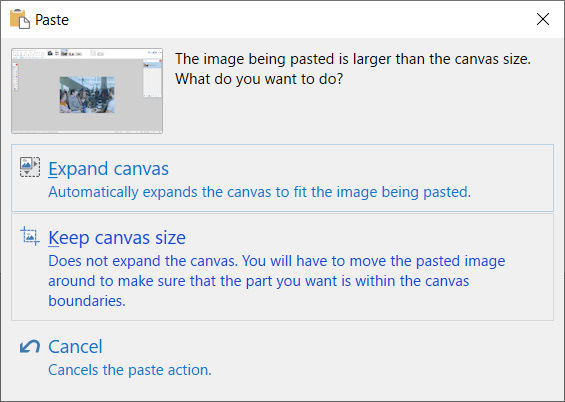
Select Keep canvas size, so we're going to place a larger image on top of a smaller blank tile and then move and crop to fit. The image we pasted on top of the blank tile shows as follows:
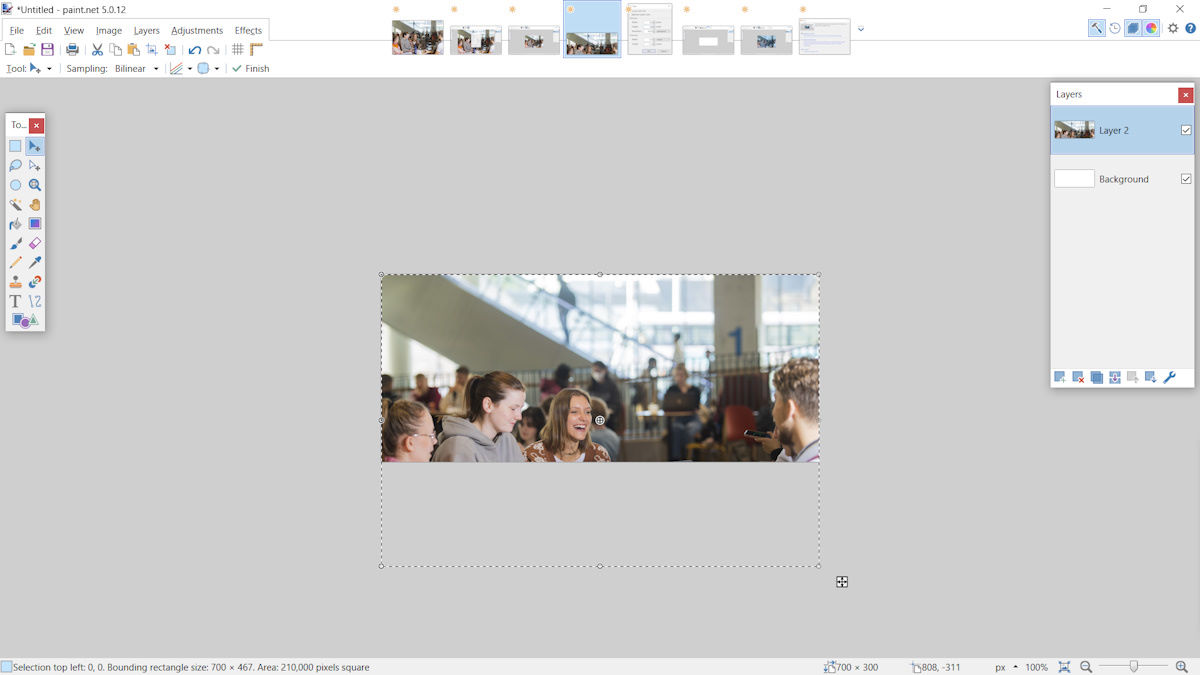
You can see the original image size from the dotted lines below the visible image.
Press up on the keyboard to move the image up and align it for a good crop. Using the keyboard here is better than the mouse as you will ensure you keep the image edges aligned:

You can see the original image dotted lines have moved up accordingly, now we want to crop the image, press control + shift + F to flatten the two layers and crop them. You can press control + D to deselect the image and get rid of the dotted lines (in case they distract from reviewing the cropped image):

If you aren't happy with the crop, press control + Z to undo and repeat to go back more steps. Went back to far? Press control + Y to re-do again.
Once you're happy with the crop, press control + S to save as:
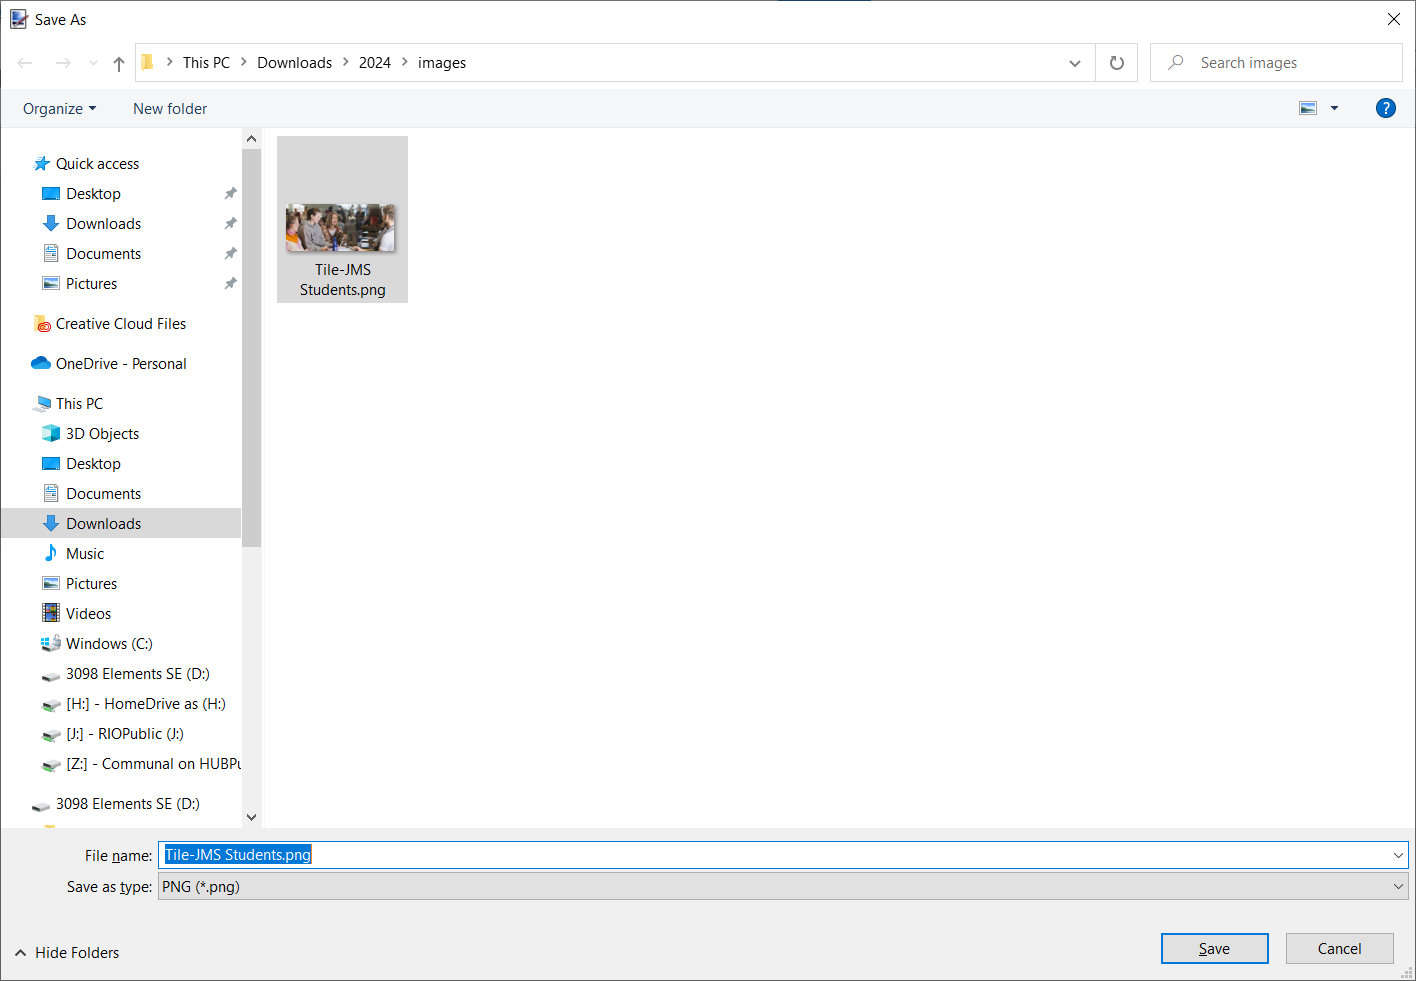
Pick a suitable location to save, name the file in a suitable format as shown then select the file type.
If you save as a JPG file type, use the slider for quality to make the image size web-friendly. A quality of 70 is usually acceptable for photographic images:
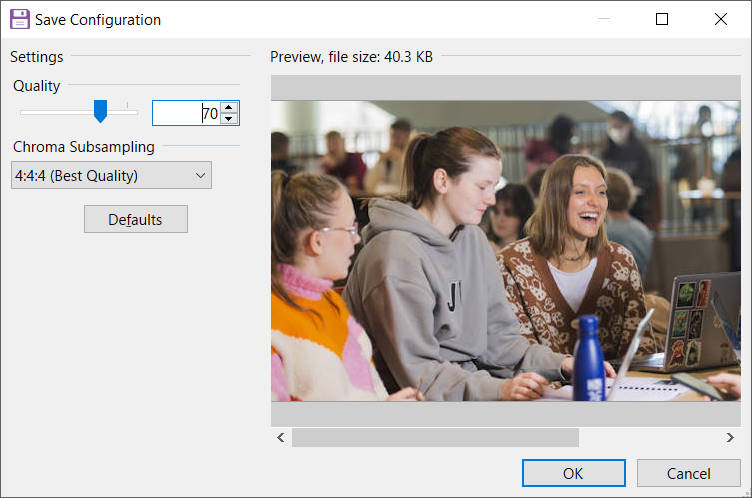
We recommend that web images are kept under 100Kb in size. When you have a low file size which is web friendly it will not take a long time to load up when people browse your website.
More info on image best practice:
www.gla.ac.uk/myglasgow/staff/webpublishing/advicefort4users/addingimages/
Web images & Paint.net tutorial PDF:
www.gla.ac.uk/media/Media_417947_smxx.pdf
IT Software Centre:
www.gla.ac.uk/myglasgow/it/softwareandonlinetools/softwarecentre/
+++
Uploading excessively large images
Check your image size
Too many images on our website are unnecessarily large. This
- frustrates users by slowing down the time a page takes to load
- adds to the carbon cost of data storage
- will attract penalties for how your pages rank on search engines like Google.
Check your images before you upload them to the media library and resize when necessary. Use our recommended pixel dimensions in the quick links column as a guide.
You may not notice you've uploaded a massive image, even after you upload/preview it. This is because a navigation tile will shrink the image to fit within its designated dimensions. But this doesn't mean the file itself is small.
We recommend that web images are kept under 100Kb in size (anything over 200Kb has a likely problem). If you are uploading images that exceed this by a lot, check them to see if the pixel dimensions match our recommendations,
You can use tools like to resize your images, so that the file sizes are no bigger than they need to be.
Note: You should not use the tools included within the t4 Media Library to resize your images, as they will not reduce the file size.
If you need help identifying and fixing large images, please contact the webteam to arrange for access to Siteimprove.
---
+++
Alternative (ALT) text
All t4 users need to understand how to apply Alternate text ('Alt text') to the images they use on the website. We do this to meet accessibility standards and to provide a good experience for all.
- Alternative text, or alt text, is used as an alternative to an image for people who use screen readers.
- Use alt text where you need to help users understand the visual content. Don’t always make the alt text a literal description of the image: think about what point the image is making.
- One piece of advice is to imagine that you’re reading out the content of the page down a telephone. When you get to the image, what would you say about it to help the listener understand the point the page is making?
Adding ALT text
To add an ALT tag for an image in t4, you must add a description to the image in the Media Library. To add a description:
- Select Content > Media Library
- find the image within your media library
- Select or edit the image
- Enter the image description in the box named 'Description': use text that fulfills the same function as the image.
For more information please see the following web accessibility article on Alt text.
Image sizes
navigation tile
- Width: 700px
- Height: consistent
[300px preferred]
image in standard content
- Width: 925px
- Height: varied
image in quick links/
staff profile portrait
- Width: 300px
- Height: varied
splash/feature/slideshow
- Width: 1400px
- Height: consistent
story summary/video thumbnail
- Width: 700px
- Height: 300px
We recommend that web images are kept under 100Kb in size.